Platform.sh is a wonderful tool to automate your deployments and make sure your site is running well. We have a lot of examples on different server-side technologies available on Github but none of them relates to static site generators.
I’ll begin with one of my favorite one that I use for this site: Hugo.
1. Setup your local machine
You’ll need 3 tools to deploy your Hugo site on Platform.sh:
- git: install git
- hugo: install Hugo
- Optional: the platform.sh cli tool
For each of these tools please refer to their own install page.
On macOS, this is basically 4 commands:
brew tap homebrew/homebrew-php
brew install curl git hugo php72-cli php72-curl
curl -sS https://platform.sh/cli/installer | php
2. Bootstrap your hugo project
We need to create a new hugo folder with the basic files:
$ hugo new site hugo-platformsh
Congratulations! Your new Hugo site is created in <path>/hugo-platformsh.
Just a few more steps and you’re ready to go:
- Download a theme into the same-named folder.
Choose a theme from https://themes.gohugo.io/, or
create your own with the “hugo new theme
” command. - Perhaps you want to add some content. You can add single files
with “hugo new
/ . ”. - Start the built-in live server via “hugo server”.
Visit https://gohugo.io/ for quickstart guide and full documentation
We now need a first article/post:

```sh
hugo new posts/hello-world.md
Open content/posts/hello-world.md, change the draft: true to draft: false and add some content to the file.
Once this is done, we now need to initialize our project git repository:
git init .
git add .
git commit -m "Init hugo"
The last step to have a fully working hugo site is to choose a theme that provides all the layouts you need to render the different pages.
I’ll use hello-friend for this example.
If you don’t want to make any radical changes, the best option is to add the theme as a git submodule because you can get new updates when they are available:
git submodule add https://github.com/panr/hugo-theme-hello-friend.git themes/hello-friendYou can also clone or even download and paste the theme in your themes folder if you want.
To enable the theme and add its default configuration, add the following toml in config.toml:
baseurl = "/"
languageCode = "en-us"
theme = "hello-friend"
paginate = 5

[params]
  # dir name of your blog content (default is `content/posts`)
  contentTypeName = "posts"
  # "light" or "dark"
  defaultTheme = "light"
  # if you set this to 0, only submenu trigger will be visible
  showMenuItems = 2

[languages]
  [languages.en]
    title = "Hello Friend"
    subtitle = "A simple theme for Hugo"
    keywords = ""
    copyright = ""
    menuMore = "Show more"
    writtenBy = "Written by"
    readMore = "Read more"
    readOtherPosts = "Read other posts"
    newerPosts = "Newer posts"
    olderPosts = "Older posts"

    [languages.en.params.logo]
      logoText = "hello friend"
      logoHomeLink = "/"
    # or
    #
    # path = "/img/your-example-logo.svg"
    # alt = "Your example logo alt text"

    [languages.en.menu]
      [[languages.en.menu.main]]
        identifier = "about"
        name = "About"
        url = "/about"
      [[languages.en.menu.main]]
        identifier = "showcase"
        name = "Showcase"
        url = "/showcase"
Add these changes: git add .
You should have the following files modified:
$ git status
On branch master
Changes to be committed:
  (use "git reset HEAD <file>..." to unstage)

	new file:   .gitmodules
	modified:   config.toml
	new file:   themes/hello-friend
Commit the modifications:
git commit -m "Add hello-friend theme"Launch the hugo local server and verify that everything is working as expected:
hugo serverOpen http://localhost:1313/. You should see the posts list and a link to your article: http://localhost:1313/posts/hello-world/
3. Create your platformsh project
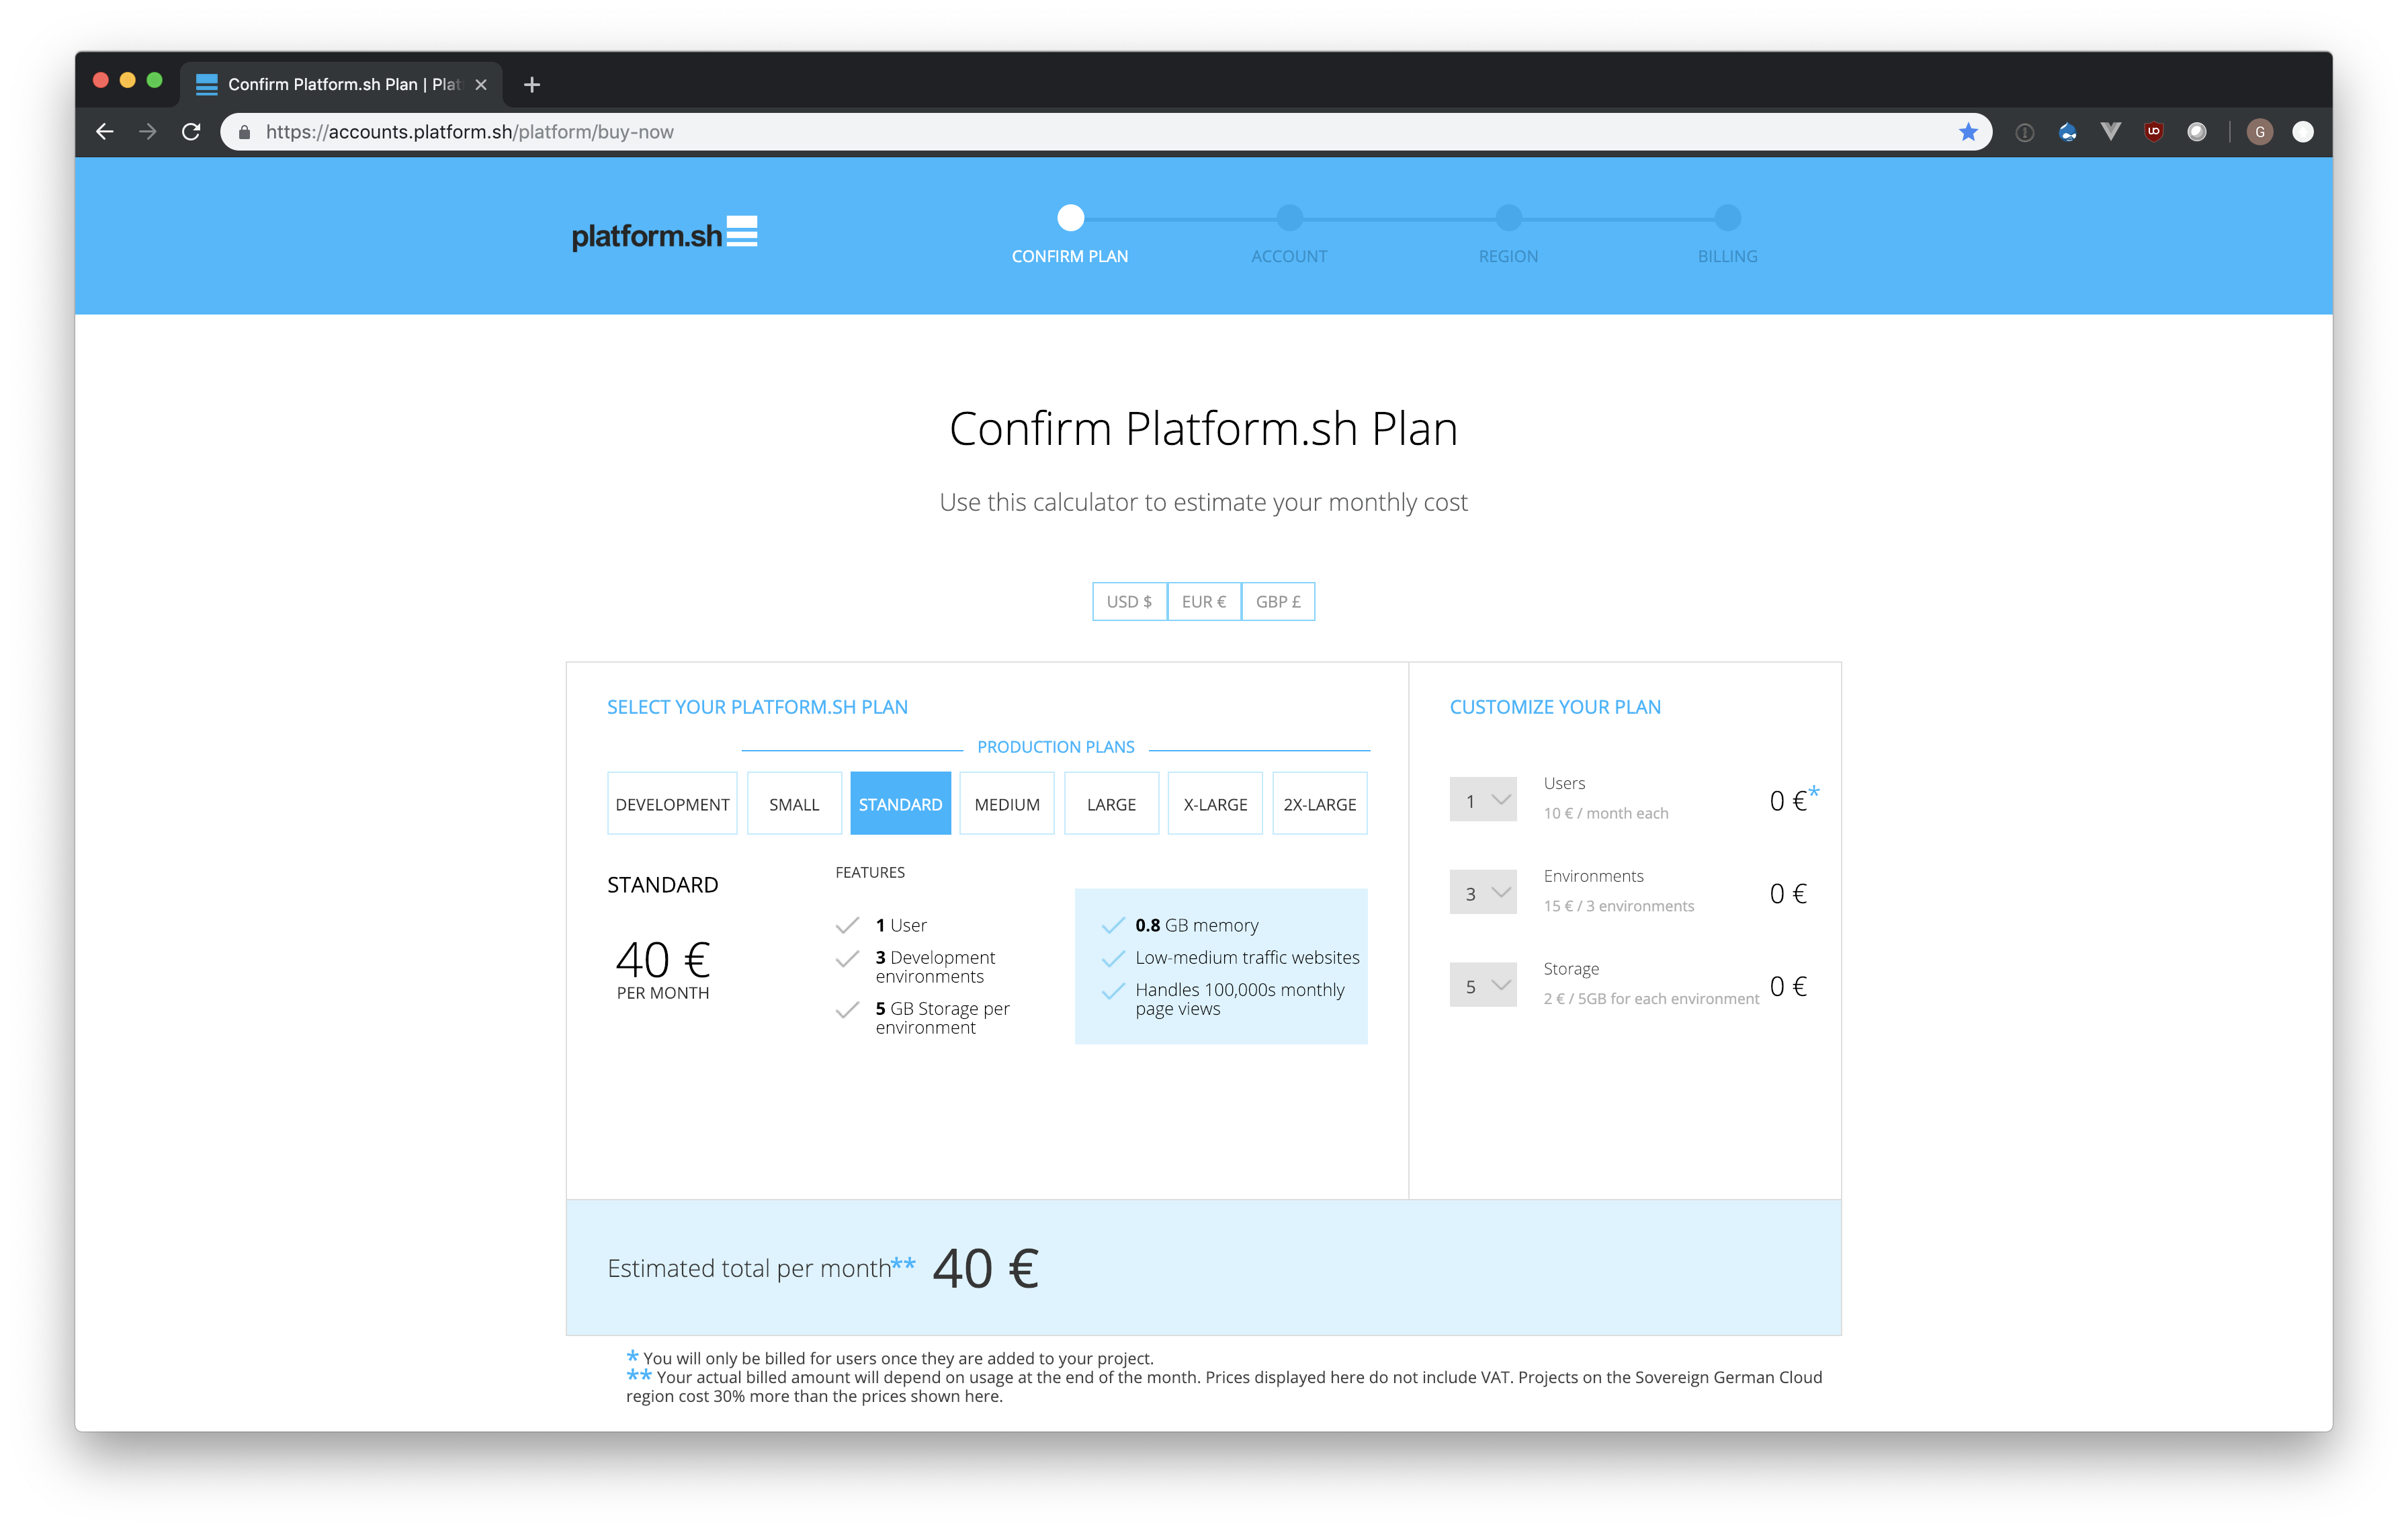
Create a Platform.sh project by signing to a trial account or log in to your account.
Select a Standard project and then choose the region you want your project to be hosted in.
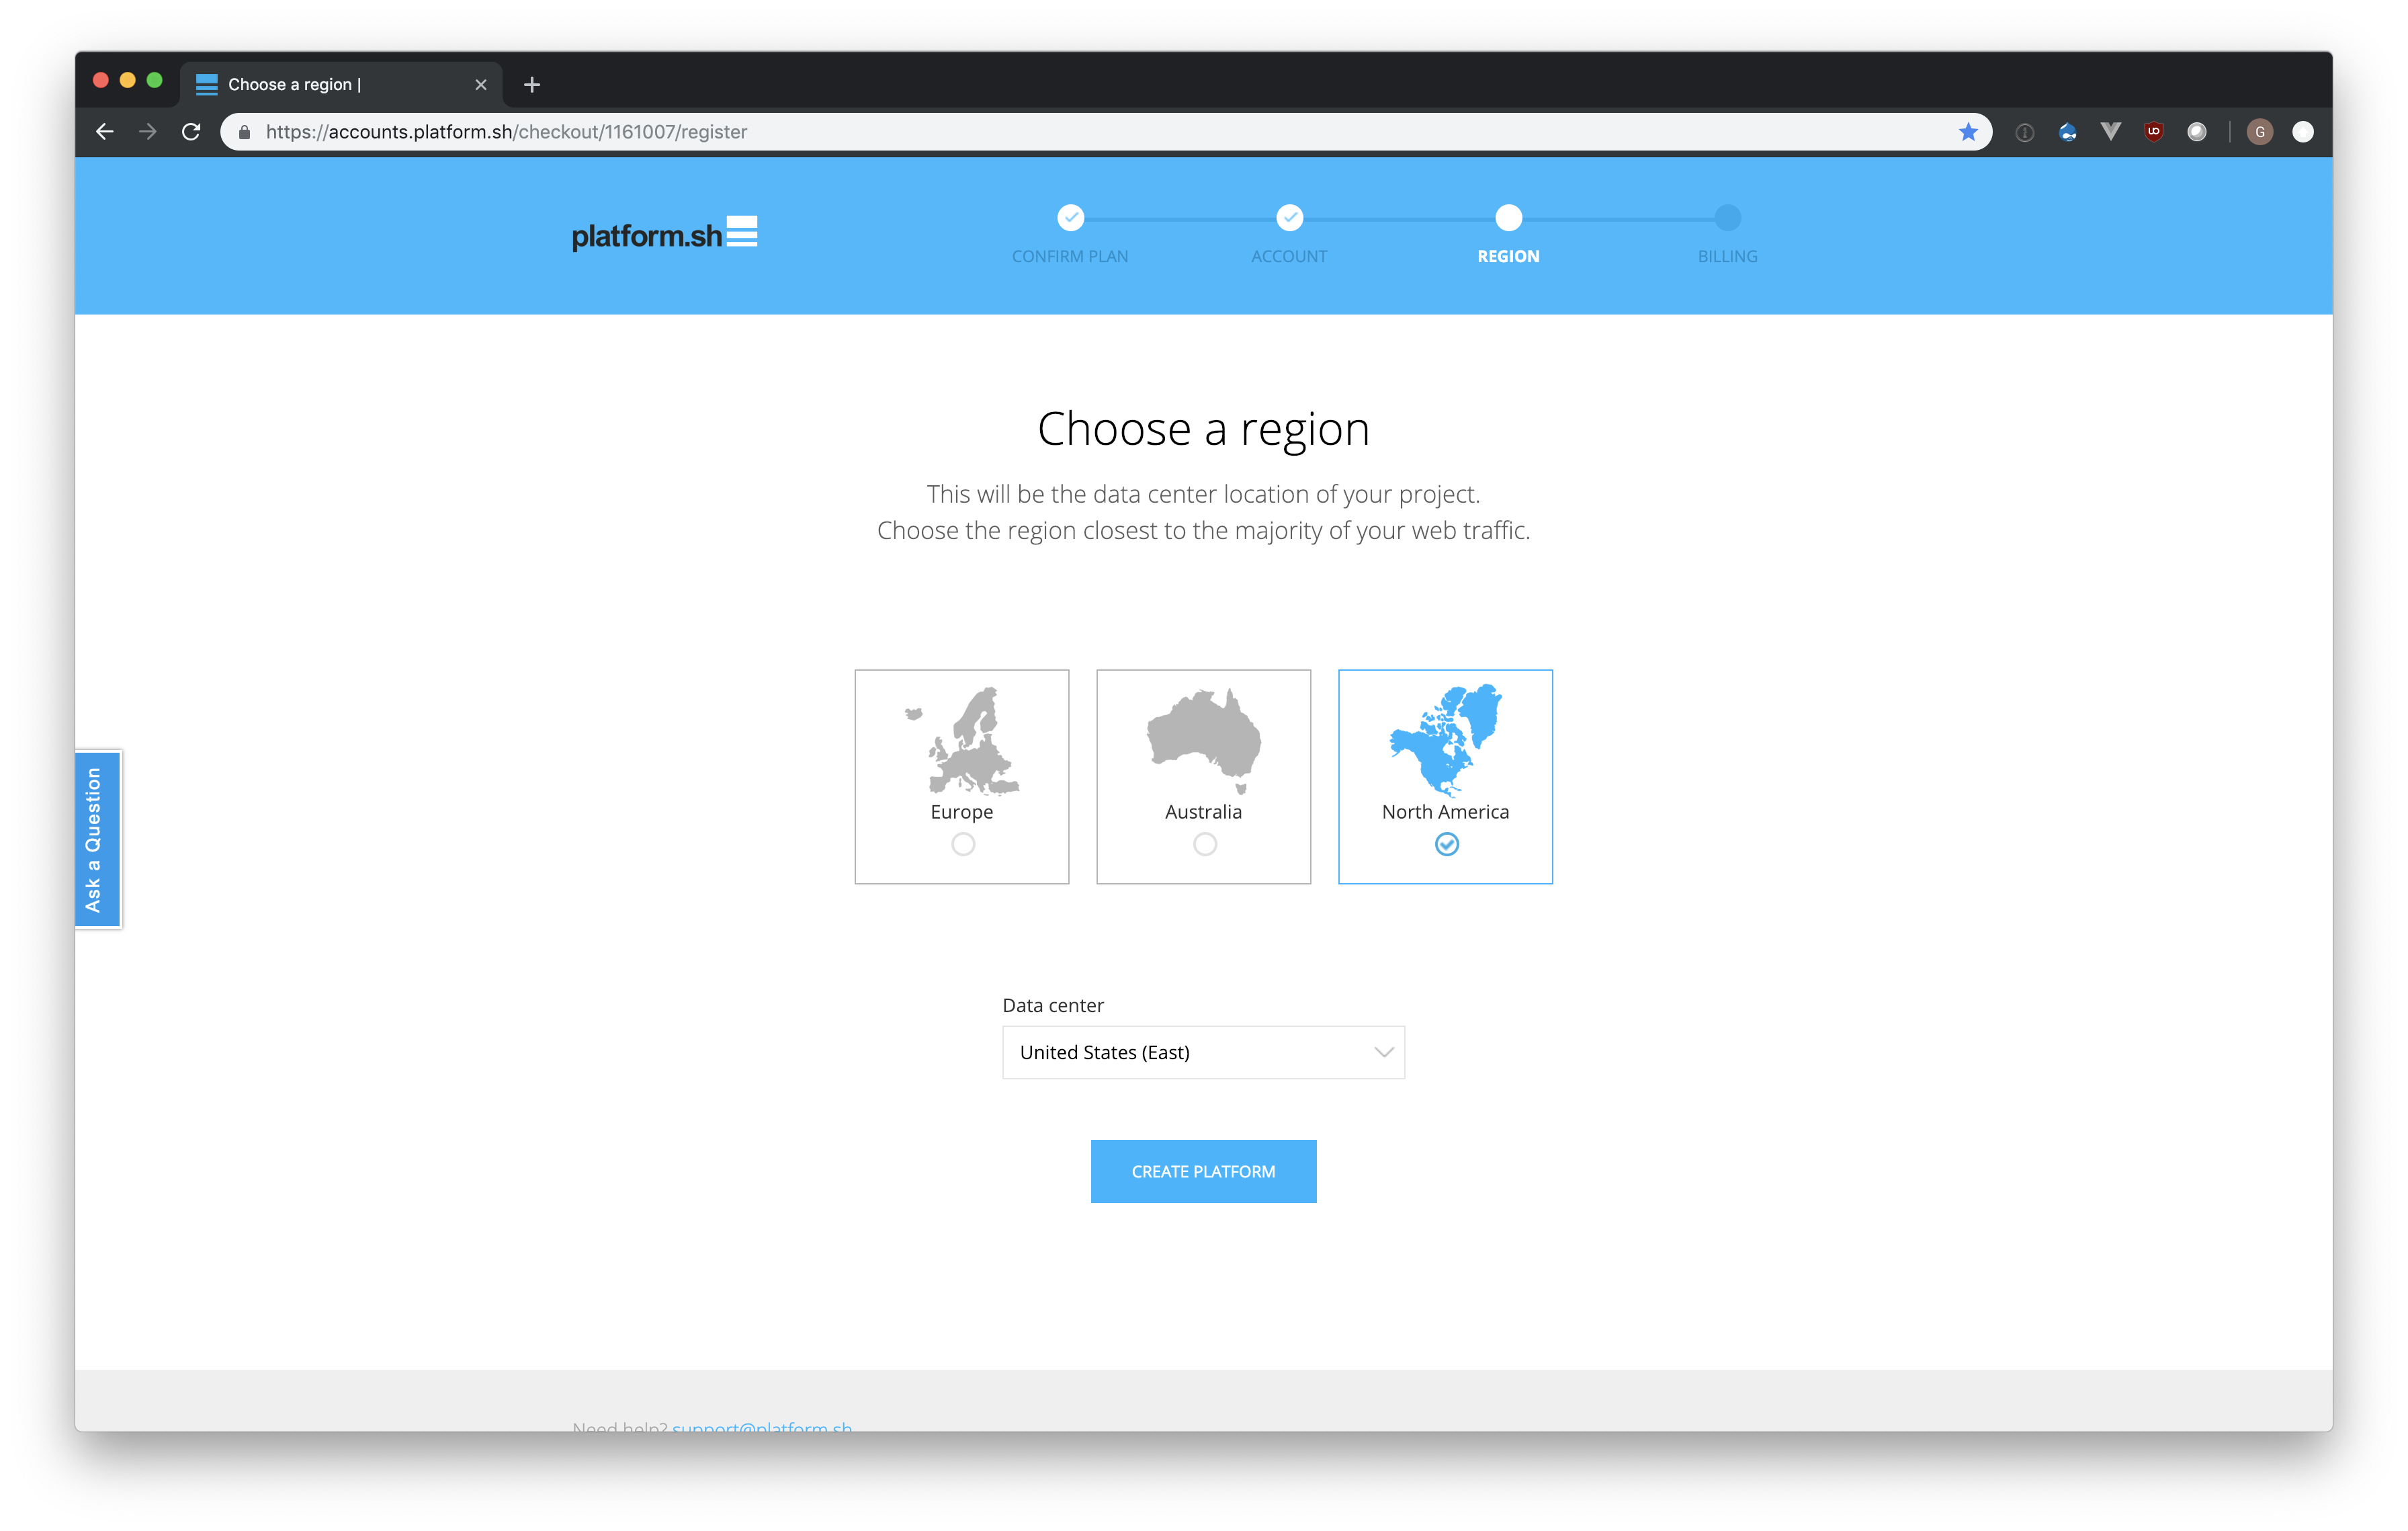
Review and validate. You can now access your newly provisioned project
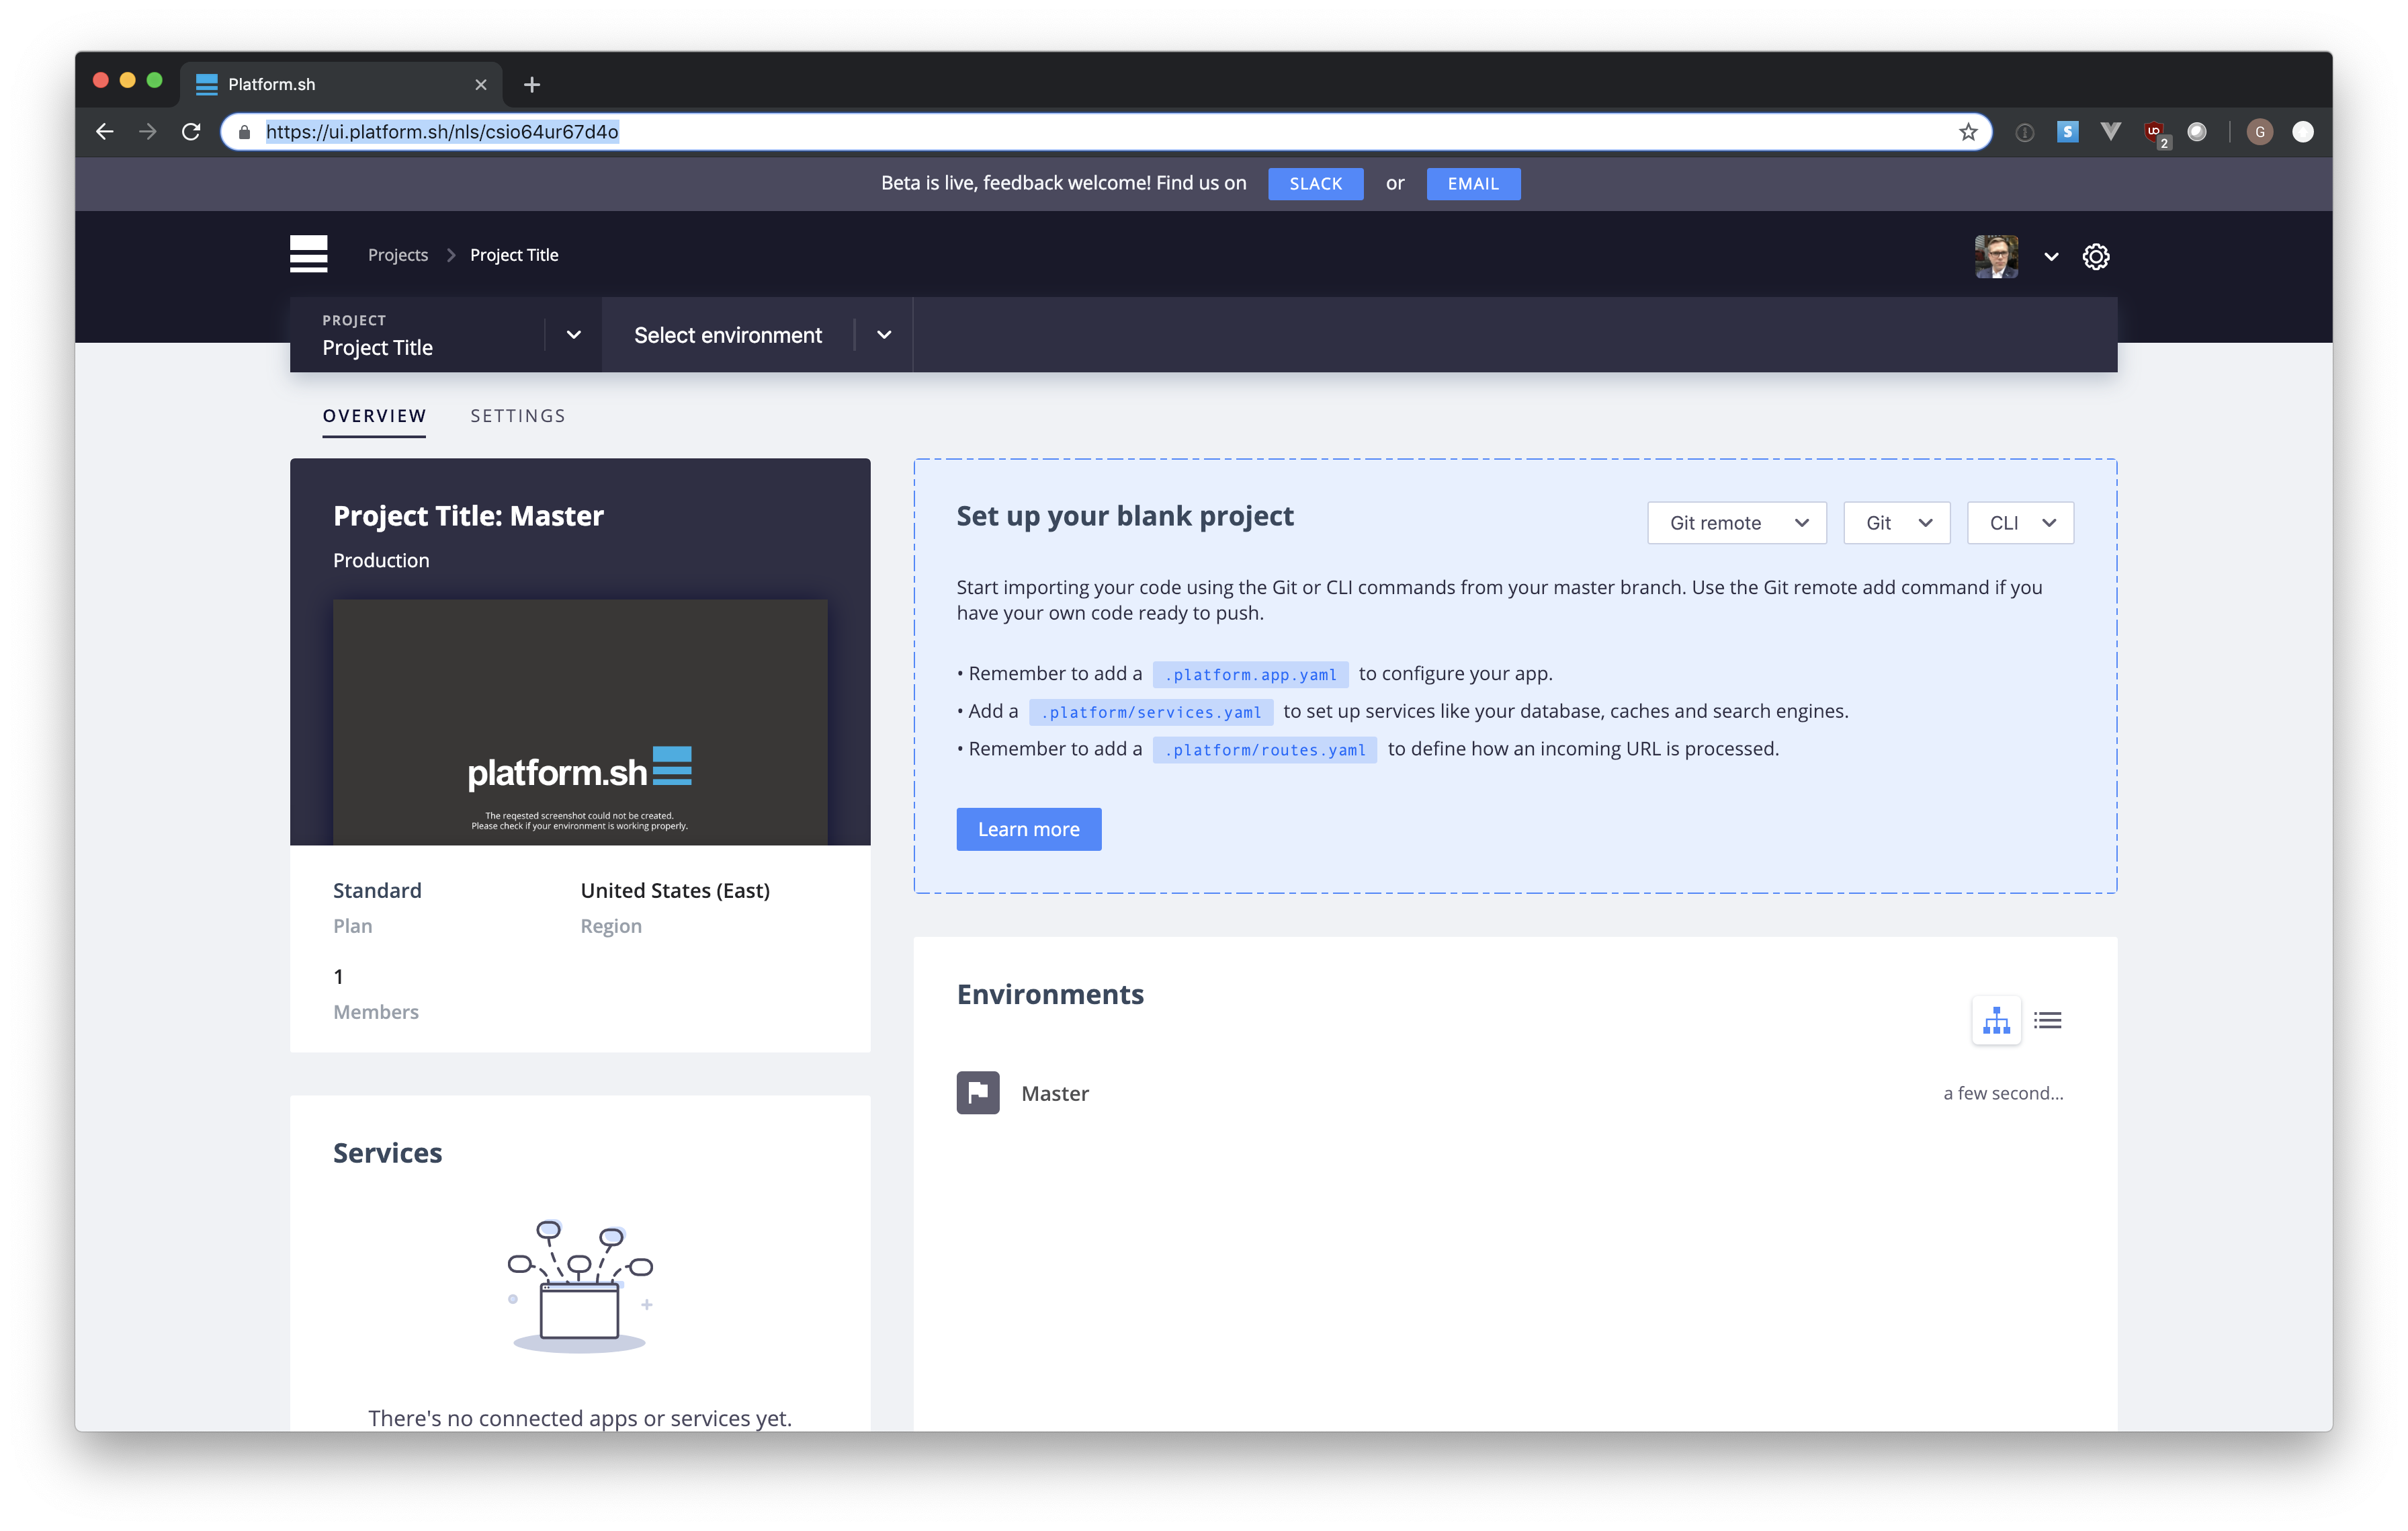
On the wizard, click Git remote and copy it.
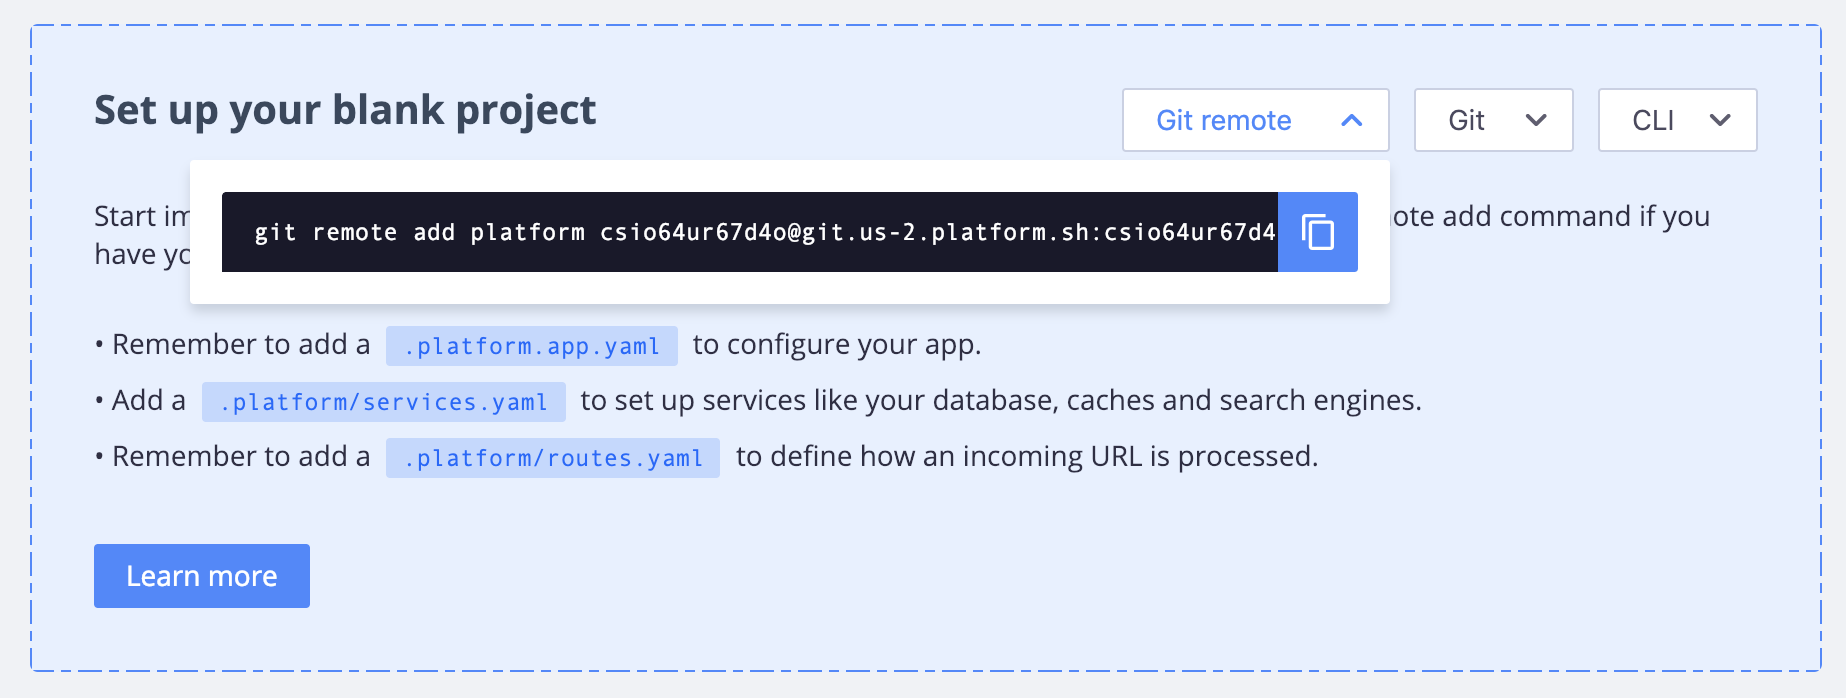
Add the remote to your local project:
git remote add platform <project ID>@git.<region>.platform.sh:<project ID>.gitDon’t push anything for now
4. Setup the .platform.app.yaml configuration
Platform.sh relies on yaml configurations to configure the different containers to deploy.
Create the .platform.app.yaml file at the root of your project and add the following code:
# .platform.app.yaml

# The name of this application, which must be unique within a project.
name: 'hugo'

# The type key specifies the language and version for your application.
type: 'golang:1.11'

# The hooks that will be triggered when the package is deployed.
hooks:
    # Build hooks can modify the application files on disk but not access any services like databases.
    build: |
      wget https://github.com/gohugoio/hugo/releases/download/v0.54.0/hugo_0.54.0_Linux-64bit.tar.gz
      tar xvzf hugo_0.54.0_Linux-64bit.tar.gz
      rm hugo_0.54.0_Linux-64bit.tar.gz
      ./hugo

# The size of the persistent disk of the application (in MB).
disk: 5120

# The configuration of the application when it is exposed to the web.
web:
    locations:
        '/':
            # The public directory of the application relative to its root.
            root: 'public'
            index: ['index.html']
            scripts: false
            allow: true
We need also two other files: routes.yaml and services.yaml. services.yaml is used to configure additional services like databases so we don’t need it for that project. Just create the file:
mkdir .platform
touch services.yaml
Add routes.yaml in the .platform folder and add the following configuration:
"https://{default}/":
  type: upstream
  upstream: "hugo:http"
This file tells the platform router to direct all incoming requests to our hugo container. Commit these new files:
git add .platform.app.yaml .platform
git commit -m "Add platform.sh configuration"
5. Test and deploy
We are now ready to deploy the project on Platform.sh. Push the repository to the new remote:
git push platform masterLet’s review the ouput of your push. The first part is basic git. Files and commits are getting pushed to the remote:
Counting objects: 36, done.
Delta compression using up to 4 threads.
Compressing objects: 100% (26/26), done.
Writing objects: 100% (36/36), 3.77 KiB | 1.26 MiB/s, done.
Total 36 (delta 8), reused 0 (delta 0)
Platform.sh then analyze your repository, pull submodules and validate your configuration syntax:
Validating submodules
Validating configuration files
Processing activity: Guillaume Moigneu pushed to Master
    Found 8 commits
The most important part is now to build your container image (the build hook). It will execute all the actions we defined in the configuration:
- downloading hugo on github
- launching hugo to generate the static site in public/
    Building application 'hugo' (runtime type: golang:1.11, tree: 4a2255e)
      Generating runtime configuration.

      Executing build hook...
        W: --2019-02-17 21:18:48--  https://github.com/gohugoio/hugo/releases/download/v0.54.0/hugo_0.54.0_Linux-64bit.tar.gz
        W: Resolving github.com (github.com)... 192.30.253.112, 192.30.253.113
        W: Connecting to github.com (github.com)|192.30.253.112|:443... connected.
        W: HTTP request sent, awaiting response... 302 Found
        W: Location: https://github-production-release-asset-2e65be.s3.amazonaws.com/11180687/20035e00-260e-11e9-8a69-0dcf2eda5a47?X-Amz-Algorithm=AWS4-HMAC-SHA256&X-Amz-Credential=AKIAIWNJYAX4CSVEH53A%2F20190217%2Fus-east-1%2Fs3%2Faws4_request&X-Amz-Date=20190217T211848Z&X-Amz-Expires=300&X-Amz-Signature=4e1d055aeb0947dcd74b04e7b9e477547d5d8ae44bc3e6e5fff1f7ed87a6f115&X-Amz-SignedHeaders=host&actor_id=0&response-content-disposition=attachment%3B%20filename%3Dhugo_0.54.0_Linux-64bit.tar.gz&response-content-type=application%2Foctet-stream [following]
        W: --2019-02-17 21:18:48--  https://github-production-release-asset-2e65be.s3.amazonaws.com/11180687/20035e00-260e-11e9-8a69-0dcf2eda5a47?X-Amz-Algorithm=AWS4-HMAC-SHA256&X-Amz-Credential=AKIAIWNJYAX4CSVEH53A%2F20190217%2Fus-east-1%2Fs3%2Faws4_request&X-Amz-Date=20190217T211848Z&X-Amz-Expires=300&X-Amz-Signature=4e1d055aeb0947dcd74b04e7b9e477547d5d8ae44bc3e6e5fff1f7ed87a6f115&X-Amz-SignedHeaders=host&actor_id=0&response-content-disposition=attachment%3B%20filename%3Dhugo_0.54.0_Linux-64bit.tar.gz&response-content-type=application%2Foctet-stream
        W: Resolving github-production-release-asset-2e65be.s3.amazonaws.com (github-production-release-asset-2e65be.s3.amazonaws.com)... 52.216.97.123
        W: Connecting to github-production-release-asset-2e65be.s3.amazonaws.com (github-production-release-asset-2e65be.s3.amazonaws.com)|52.216.97.123|:443... connected.
        W: HTTP request sent, awaiting response... 200 OK
        W: Length: 7767211 (7.4M) [application/octet-stream]
        W: Saving to: ‘hugo_0.54.0_Linux-64bit.tar.gz’
        W:
        W:      0K .......... .......... .......... .......... ..........  0% 27.9M 0s
        [...]
        W:   7550K .......... .......... .......... .....                100%  140M=0.1s
        W:
        W: 2019-02-17 21:18:48 (61.5 MB/s) - ‘hugo_0.54.0_Linux-64bit.tar.gz’ saved [7767211/7767211]
        W:
        LICENSE
        README.md
        hugo
        Building sites …
                           | EN
        +------------------+----+
          Pages            |  9
          Paginator pages  |  0
          Non-page files   |  0
          Static files     | 16
          Processed images |  0
          Aliases          |  4
          Sitemaps         |  1
          Cleaned          |  0

        Total in 14 ms
Platform.sh then checks that everything seems correct and deploys the container to a host. You’ll see that Platform.sh also generates the Let’s Encrypt TLS certificate for your project.
      Executing pre-flight checks...

      Compressing application.
      Beaming package to its final destination.

    W: Route '{default}' doesn't map to a domain of the project, mangling the route.

    Provisioning certificates
      Validating 1 new domain
      Provisioned new certificate for 1 domains of this environment
      (Next refresh will be at 2019-04-20 20:19:01+00:00.)
      Environment certificates
      - certificate 18bf626: expiring on 2019-05-18 20:19:01+00:00, covering master-7rqtwti-<project ID>.<region>.platformsh.site


    Creating environment <project ID>-master-7rqtwti
      Environment configuration
        hugo (type: golang:1.11, size: M, disk: 5120)

      Environment routes
        http://master-7rqtwti-<project ID>.<region>.platformsh.site/ redirects to https://master-7rqtwti-<project ID>.<region>.platformsh.site/
        https://master-7rqtwti-<project ID>.<region>.platformsh.site/ is served by application `hugo`
The last output is the new URL of your application. You can also check that the project has been successully deployed on the web interface:
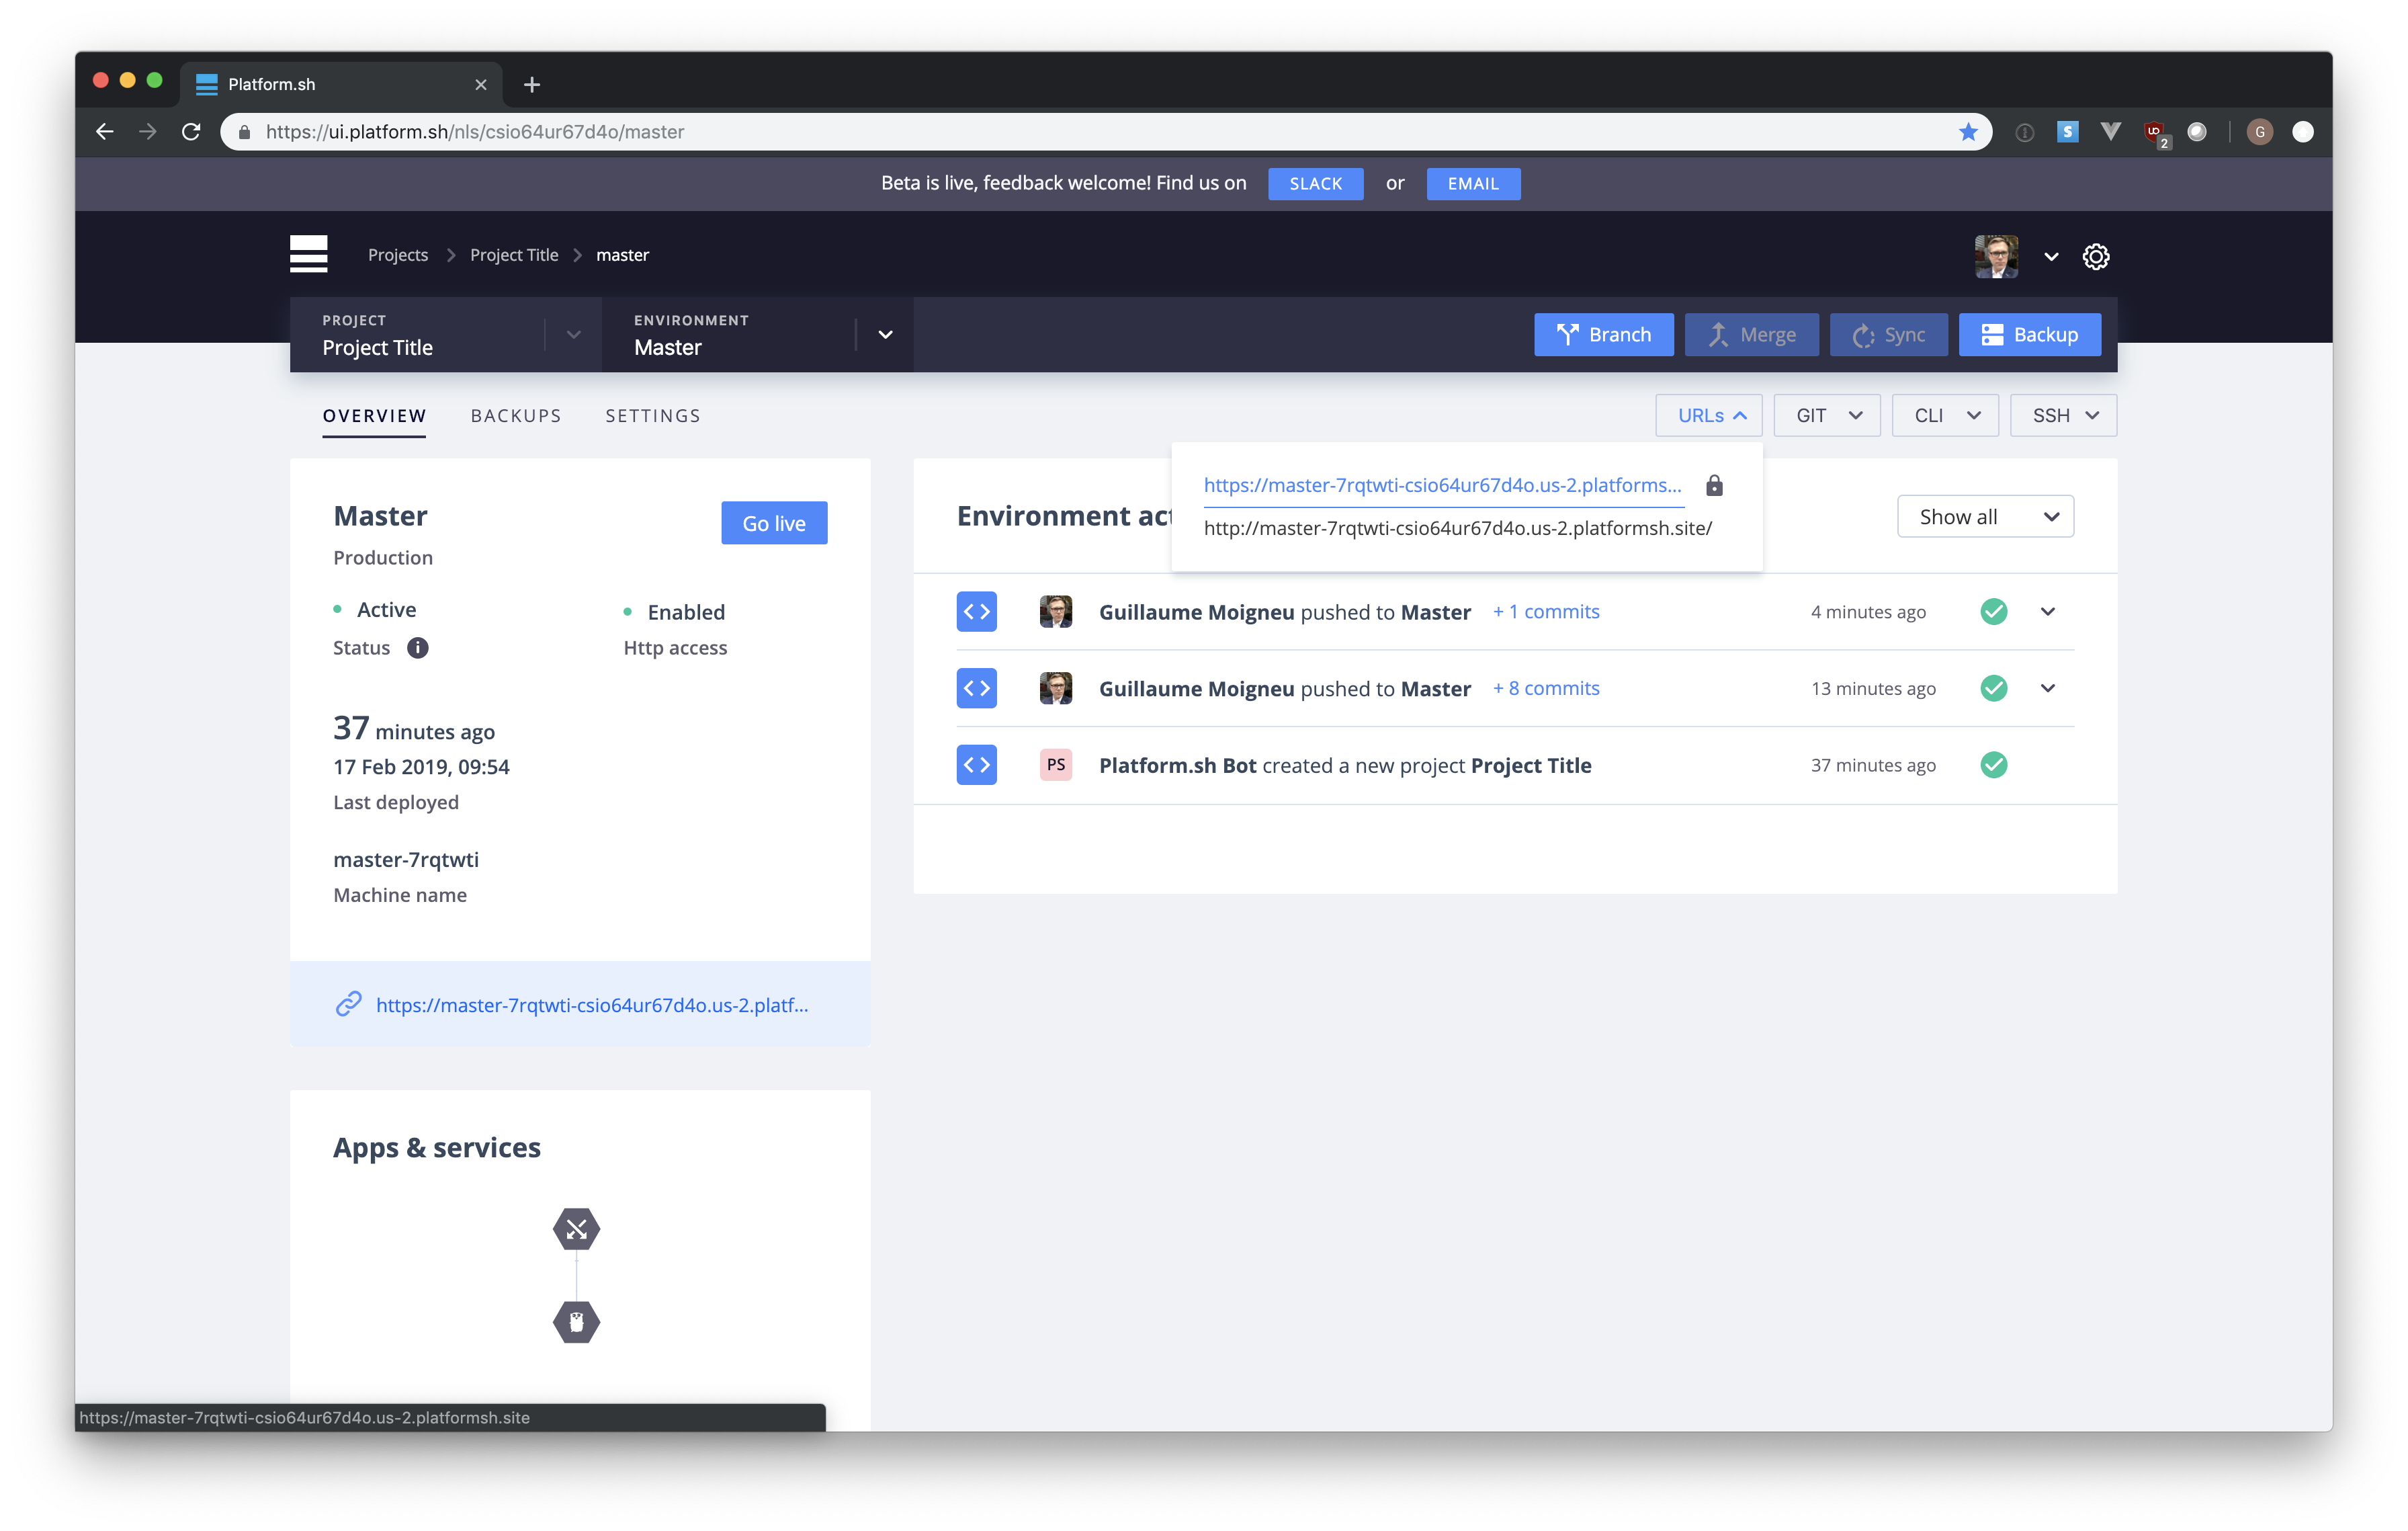
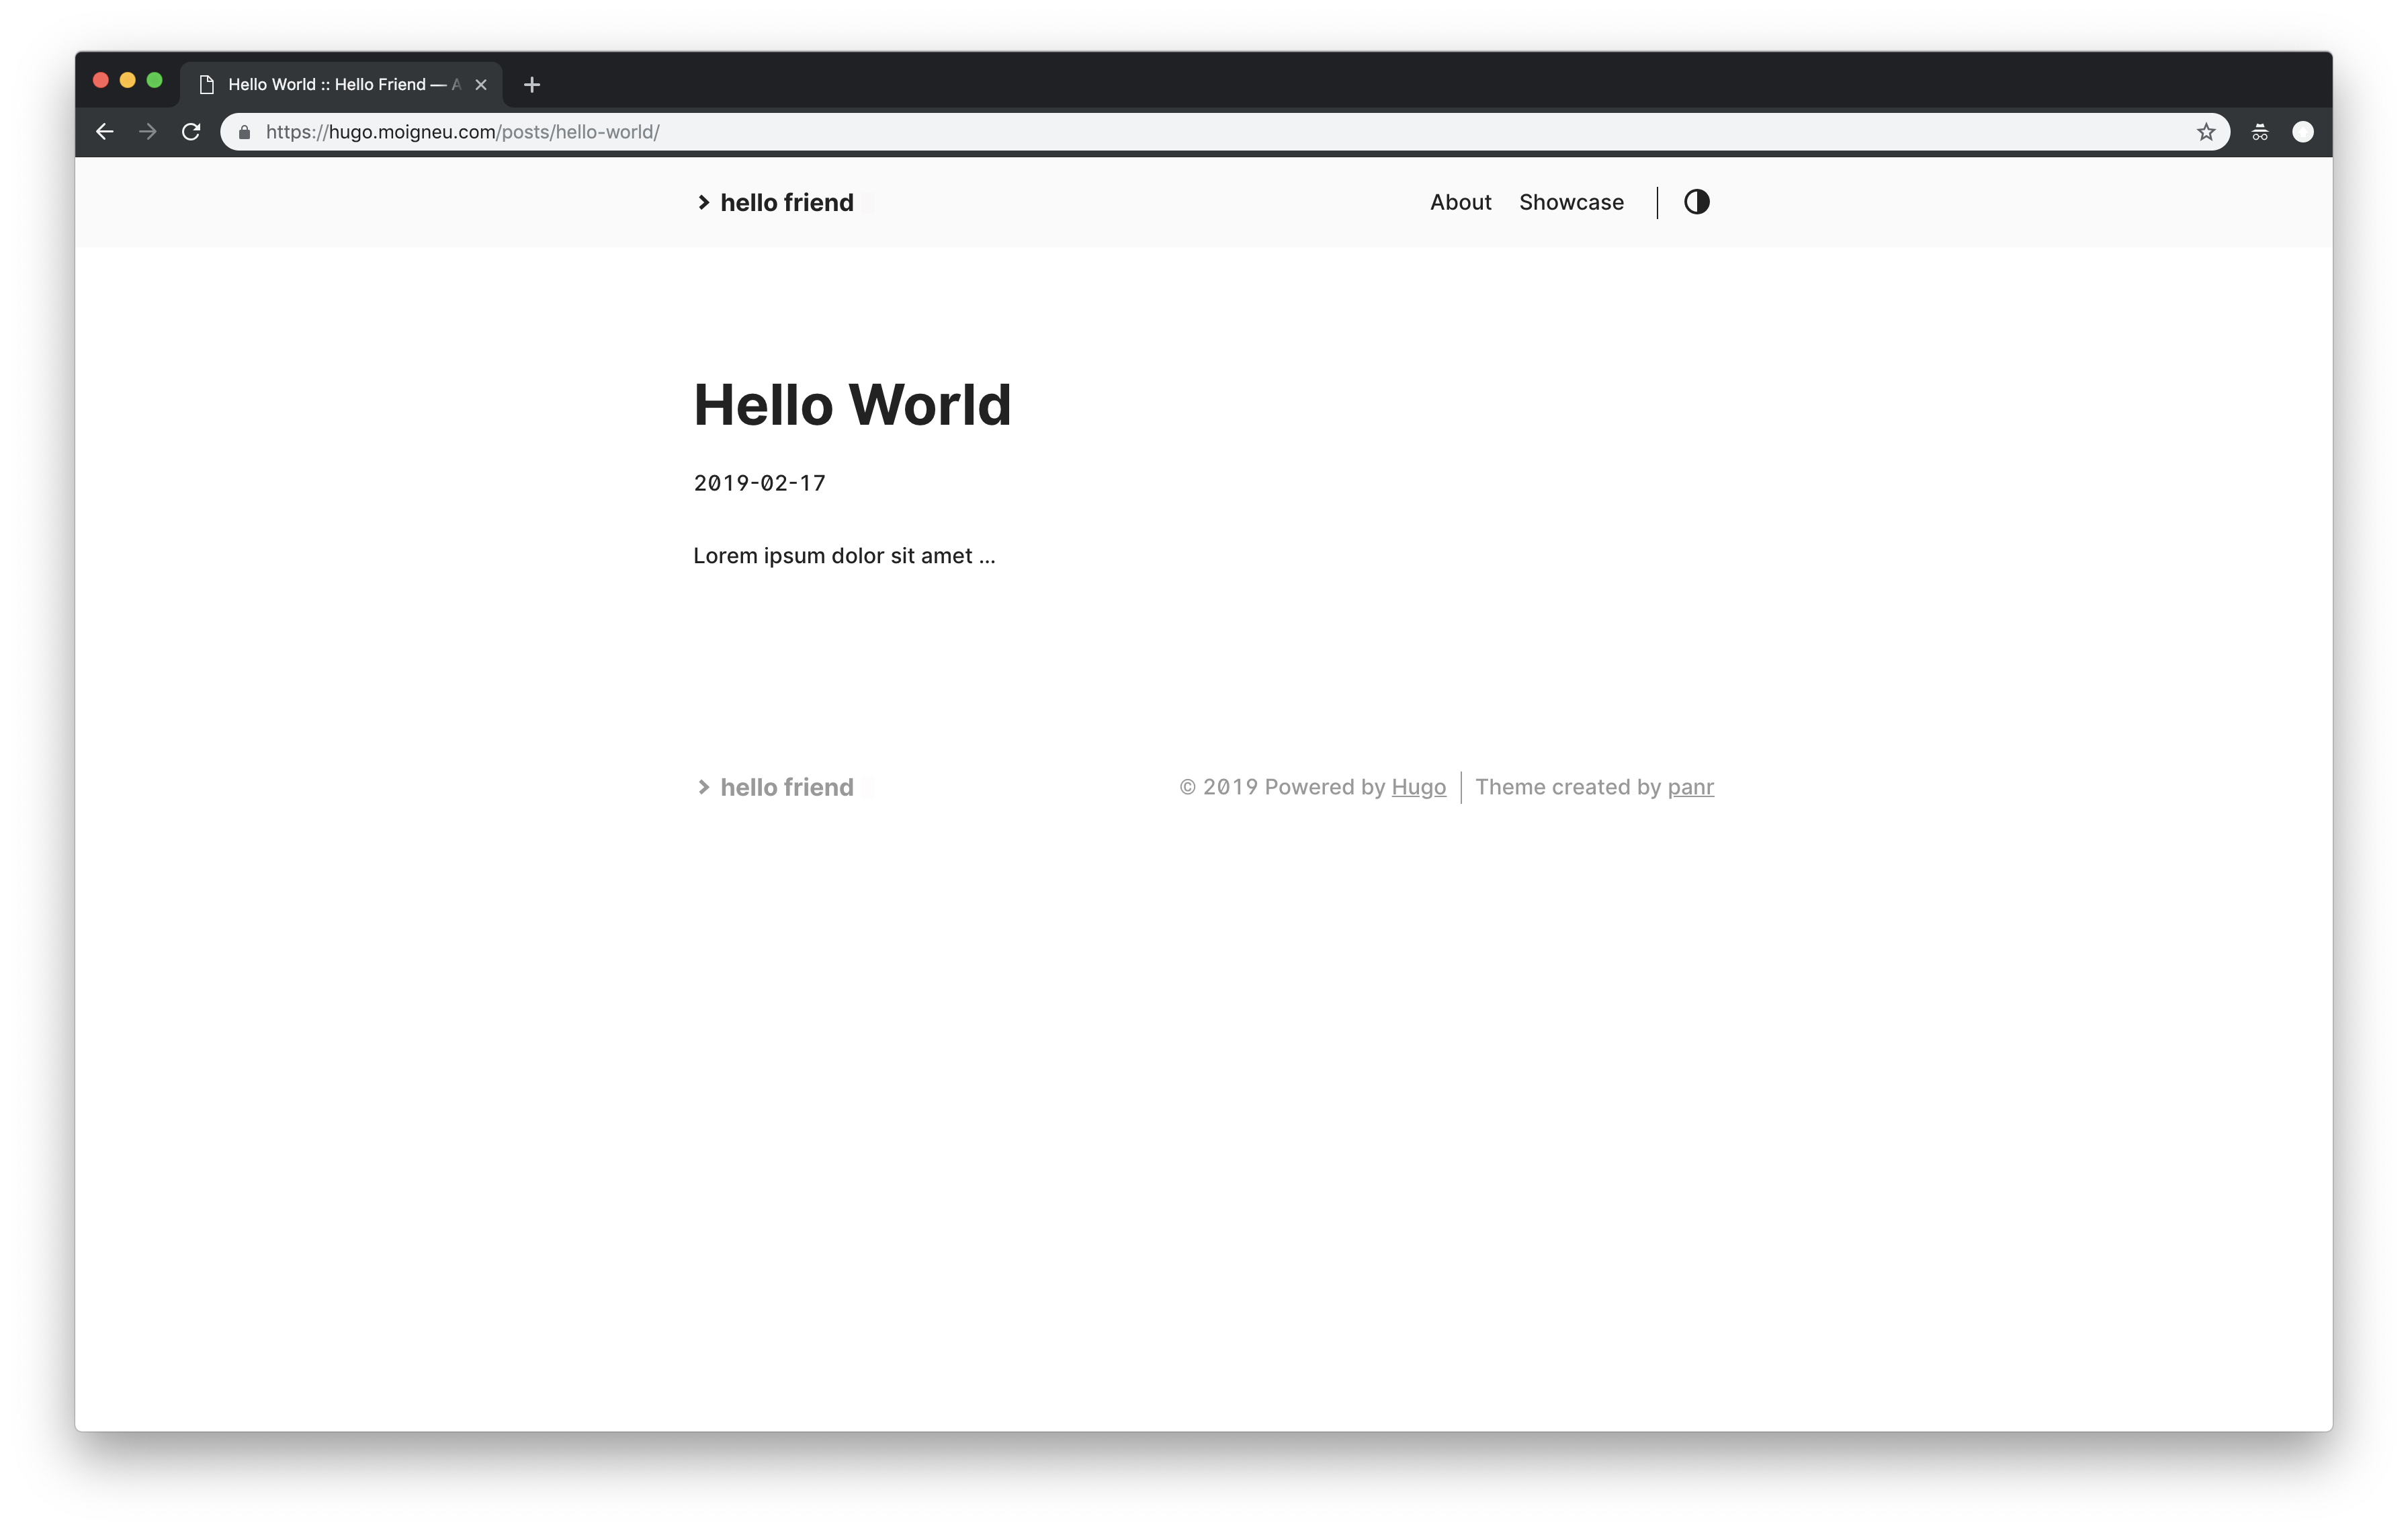
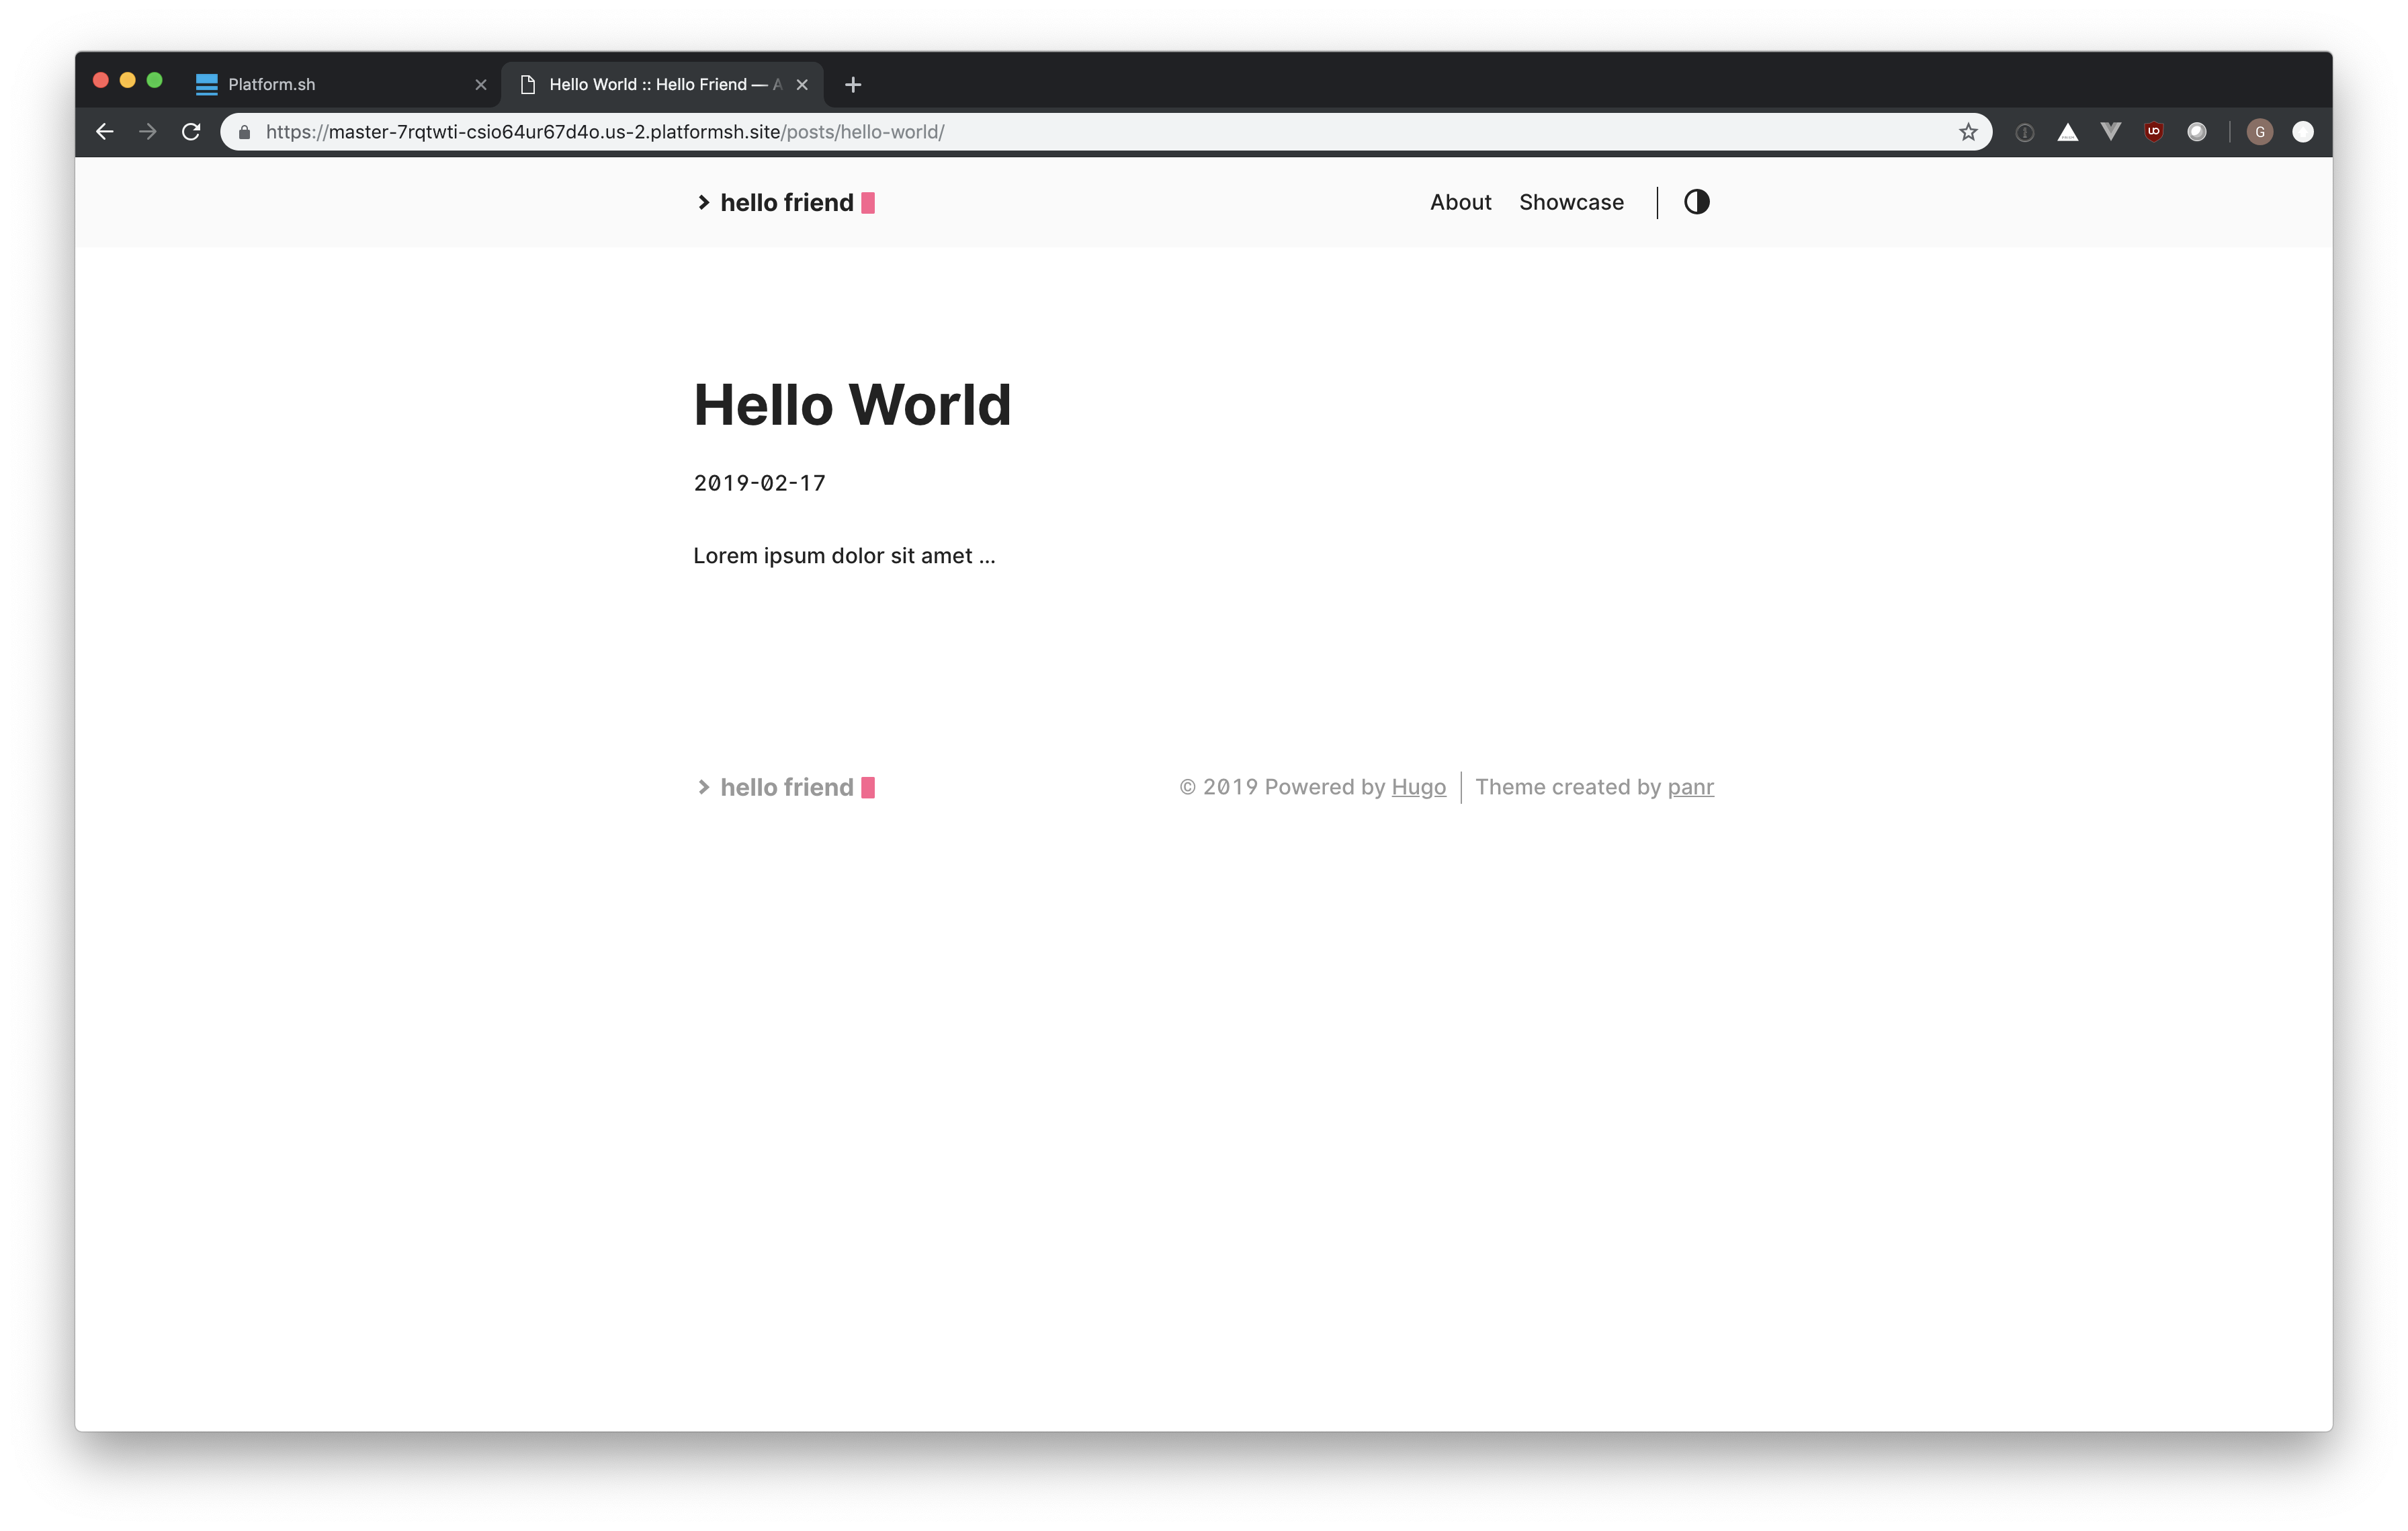
Now go the URL and you will be able to see your hugo site:
6. Configure your domain name
As I want to host the site on hugo.moigneu.com, I just need to add a new CNAME with the name hugo and the target master-7rqtwti-<project ID>.<region>.platformsh.site that was my existing URL on Platform.sh.
We now need to add a DNS record to match this. I’m using Cloudflare for my domains DNS configuration but it will be the same with any other provider.
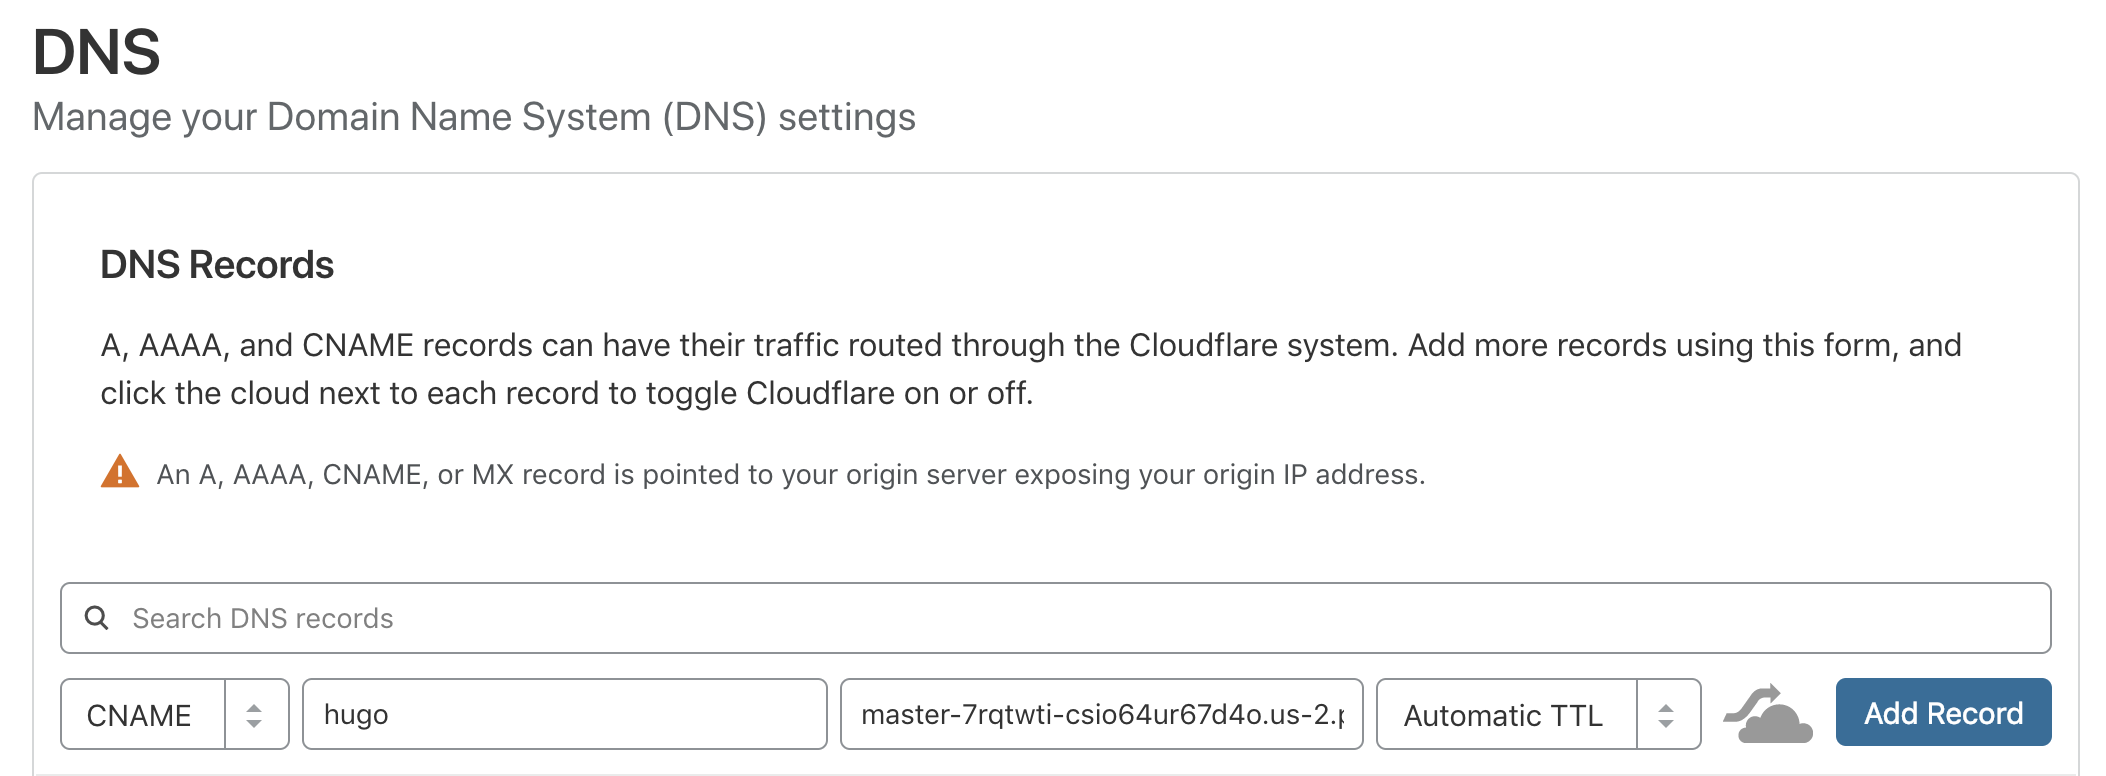
If you can’t use a CNAME, add 3 A records with the IPs available on Platform.sh public IPs.
Wait for the DNS to propagate and you will be able to add the domain on Platform.sh.
Go to your Master environment Settings / Domains and add the hostname of your hugo site
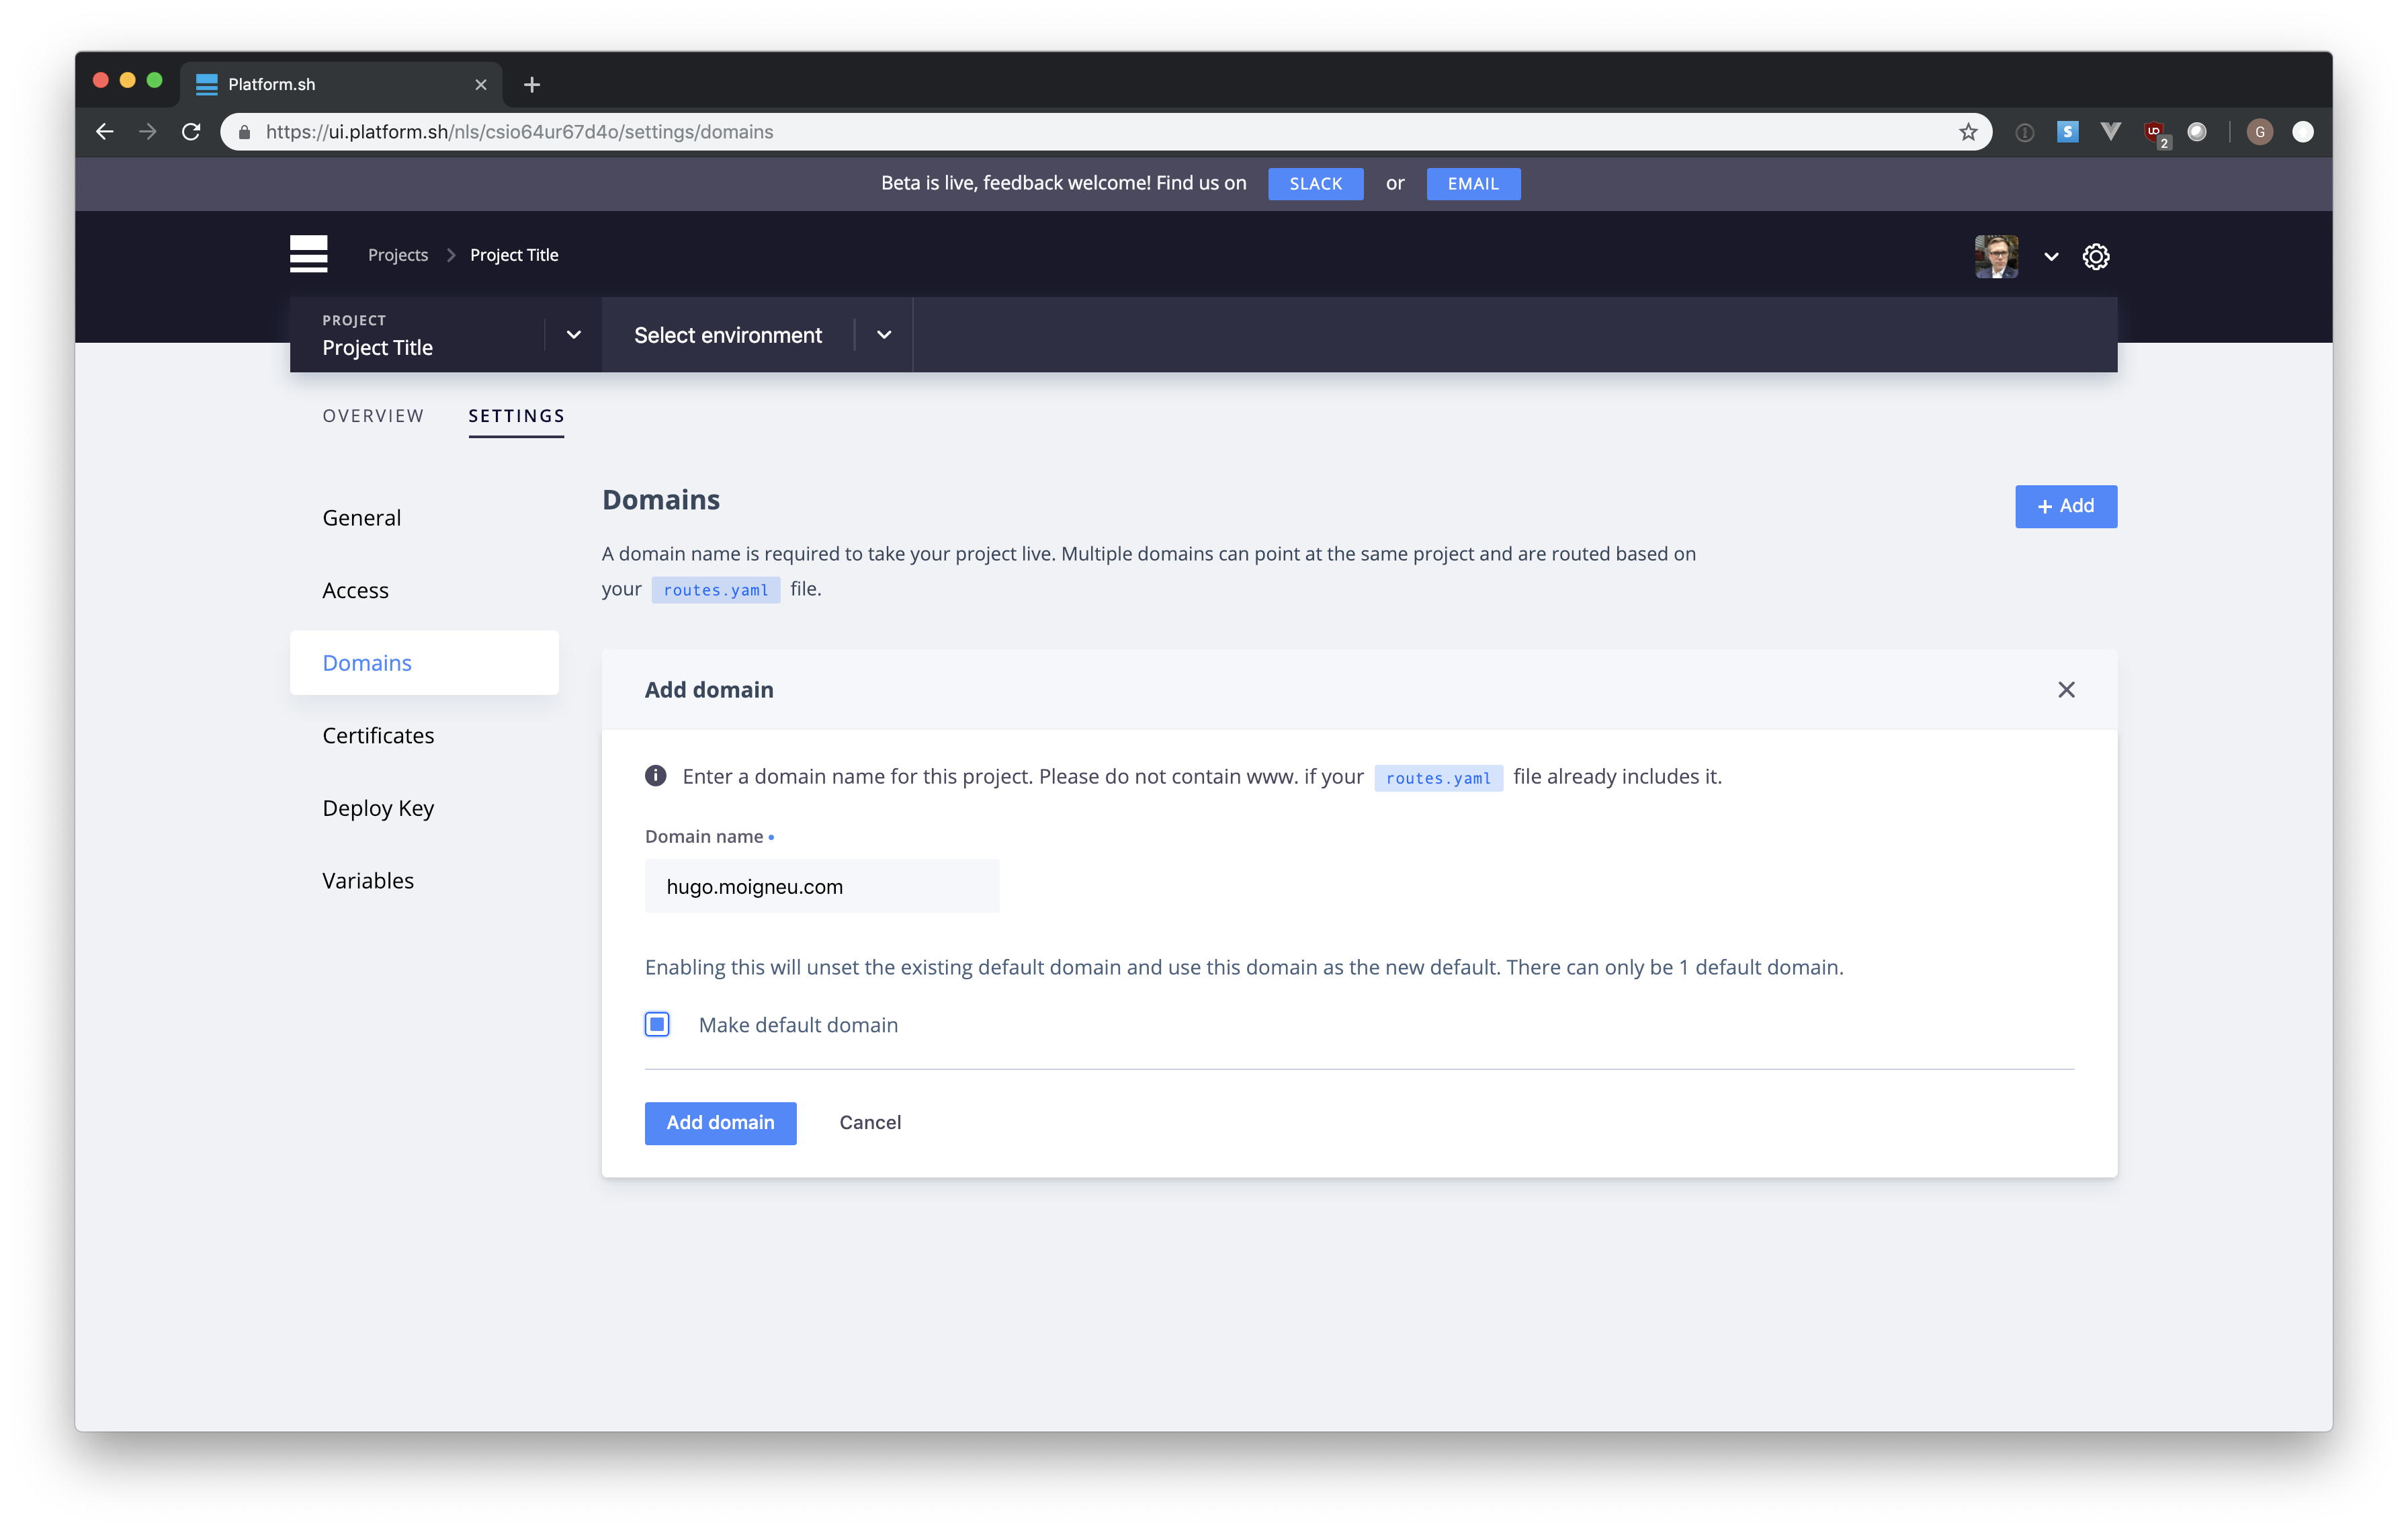
Platform.sh will redeploy your site to apply the new routing rules.
If the Let’s Encrypt TLS challenge fails, it means that your DNS setting is not yet effective. You can redeploy a project by repushing new code or by using the Platform.sh CLI (env:redeploy).
You can now access your site with the final URL: